Sunday, December 23, 2012

Christmas Decoration Storage

Well Christmas is almost here and if you're anything like me the decorations will be coming down soon after!  Here are a few tips on storing your ornaments/decorations without breaking them.

1.  Save your tissue Christmas morning!  If you made bows this year for your garlands or tree you are going to need tissue paper.  I use tissue to put in each of the loops to prevent smashing the bow while in storage.  This will help your bows last longer.  You will also want the tissue to wrap your ornaments in.

2.  Buy large plastic bins to store decorations.  There are several reasons to just spend the money now on the bins.  They stack, keep out bugs, are waterproof, have handles, have lids....I think you get the picture that I like the storage bins!  I even have the larger bins to store my fireplace garland in.  For any garlands, take any bows and breakable ornaments off, then place gently in the bin.  If you still have room on the top you can place your stuffed bows and fragile ornaments on top.  

3.  Pack by room.   When I'm putting my Christmas away I just want it to be done and I always have to remind myself to take the time to do it right.  Next year I will be grateful.  Dedicate a bin (or more if needed) per room and make sure you label your bins.  This will make it easier next year when you are getting everything out and put in the correct place.  If you are packing bows or florals pack these last.  You will want to place them on top of your ornaments or even dedicate them to their own bin.  

4.  Keep glass ornaments out of the attic!  If you have glass ornaments you do not want to see broken or any ornaments with tons of glitter and glue, do not keep these in the attic or garage.  The summer heat will break them or melt the glue.  Find a place in another closet to keep these.  If you are one of the lucky ones with a basement you are set!

5.  Wreaths  The easiest option here is to buy a wreath bin to store it in.  If you would rather you can place it on top of your bins but make sure you place an old sheet over it to keep the dust off.  Again if there are bows pack the loops with tissue.  

These few extra steps will keep everything looking great next year.  

Enjoy your holidays!!!  

Thursday, December 6, 2012

Christmas Tree Bow

The important thing to know before you start your bow is it is more painful then difficult.  Promising right?!  Whatever hand you are using to hold the bow center in place will probably start to cramp so be prepared to take breaks when needed by switching hands.  

1.  Items you will need:  To make your bow you will need wrapped floral wire (I use a 22 gage) and wired ribbon.  I use the wrapped wire because it is easier to grip when securing the bow and it makes placing on the tree simple.  When choosing ribbon make sure you buy some that has a strong wire edge.  This will help your loops hold their shape and will make your bow last longer.   I used 2 different ribbons to make the following bow.  I have also made them with 3.  Same techniques apply you just might not need as many loops.  


2.  Starting your loops:  Before you start your first loop decide if you want any tails coming down from your bow.   You will need to start your loop higher up and leave extra ribbon hanging if you do.


Once you have decided on the length of your tails make your first loop then twist the ribbons where they meet back together.  This first twist will be done with all 4 ribbons whereas the rest of your loops will be done with the two ribbons used to make that loop.  This now becomes your center point where all your loops will meet and twist.  You will need to hold on to this point tight while making the rest of your loops.   Examine the size of your loop.  Is it going to be large enough for the top of your tree?  For an 8 1/2 tree you will want a loop about 8-10 inches long.  If your ribbon is not wired well you will need to make the loops on the smaller side so they do not come out floppy.


Have your second loop go out the opposite direction from the first but bring the ribbons back to where you twisted the first loop.  Twist the 2 ribbons of the second loop.  You will now be holding 2 twists at the center point.  Continue making loops alternating the direction each time.  For a 8 1/2 foot tree you will want ten loops on each side making a total of 20 loops.


Here is the bow after making the 20 loops.  I am showing both sides so you will see how I am holding the bow.


3.  Securing your bow:  Now you can secure your bow with the wire.  Make sure as you wrap the wire around the center twists you are securing your initial twist with it's tail.  If you do not get the tail under the wire you will unravel your first loop.


I pull my wire tight to make it easier to separate the loops and fluff the bow.  


Twist your wire ends together close to the center point.  


 4.  Dove-tail the ends:  To make the pretty inverted V shape you will fold the 2 ribbons in half lengthwise then cut down towards the end of the ribbon.  Cut your second tail the same length as your first.


5.  Fluff your bow:  Now you get to make your bow pretty.  Each of your loops has 2 ribbons together.  Gently pull the ribbons apart alternating the color each time so you don't have all your golds on one side and all the red on the other side.


Isn't it pretty?!  Ok, so it's not pretty yet but now all your ribbons are separated.  Don't give up if your bow is looking pretty sad at this point.  Go back to each loop and utilize that nice wire ribbon you bought and round them out.  


This is what you will end up with.  It looks even better once you put it on the tree because the tree will help push the loops up making the bow look larger than it is.  This bow went home with a friend so I do not have a pic of it on top of the tree but I am told it looks great!


Don't give up if you don't succeed the first time.  It may take a few tries but then you will have mastered the art and your friends will be happy for you to make their bows!  Happy bow tying!

Garland on your Fireplace Mantle

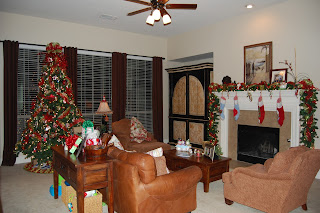
So after many late nights my Christmas is up.  Hubby likes to say it looks like a forest in our family room because of all the green but I love it!  After putting up my garland I thought hey here's my next post.  Tips on keeping your garland on the fireplace mantle.


1.  Getting your Garland to stay on the mantle:  The first step is to put some very small nails in the back of the mantle on both ends.  Take a wrapped floral wire (wrapped is much easier to work with and will not scratch the wood like plain wire can) and slightly bend it in half.  This will make it easier to feed an end over and under the garland.  Start at the front of the garland letting the ends poke through towards the nail.  Once you have it through pull it as tight as you want.  My garland is sitting about in the middle of my mantle.  If you have items you want to put in front of the garland pull it tight towards the back to make room.   Once the garland is in the desired place start wrapping the ends around the nail.  You'll notice my garland lays across the mantle instead of dipping in the middle.  I added a third nail in the middle back part of my mantle to make sure my garland didn't slip off.


2.  Getting your stockings to also stay on the mantle:  The question I hear quite a bit is, "How do you get your stocking holders to stay on the mantle when you have kids?"  Two answers depending on the stocking holder.  Floral wire or duct tape.  (Duct tape fixes everything!)  With my stocking holders I  used a floral wrapped wire and secured it to the garland.  That way if little hands get grabby the stocking holders stay in place since you have already wired the garland to your mantle!  If you have stocking holders that lay flat on top of your mantle, just place a piece of duct tape across the top.  Your garland will hide the tape.  I also like to stuff a few pieces of tissue paper into my stockings so they look full.


 3.  Decorate:  I decorate the garland after it and the stocking holders are securely placed.  This way I am sure to get the ribbon and ornaments where I will be able to see them.  If you are adding glass ornaments you will want to remove them before you store your garland so they don't break.  When adding ribbon I like to go back and forth across the front of the garland so it does not have just a straight line of ribbon.


My garland has a bow on either end.  When I decorate a garland that dips in the middle down off the mantle I like to add a bow in the center.  


I like to add in a little something unexpected in my wreaths and garlands hence the Mark Roberts fairy in the center of my garland.


An easy way to store your garlands at the end of the season is in the large storage bins with lids you can buy at Walmart, Target or the Container Store.  These are large enough to hold 2 and sometimes 3 garlands without needing to really squish them and the lid will keep the dust off.  The best way to store your bow each year is to remove it from your garland, place scrunched up tissue paper in each loop then place either in it's own bin or on top of the garland in it's bin.

Friday, November 23, 2012

Decorating Your Christmas Tree

It's that time of year again where the turkey is gone and it is now fully acceptable to put up the Christmas tree.  Below are some tips I use while decorating in my own home and for my clients.   I hope these tips help you while decorating.  


1.  Lights
I love lights!  The worst thing though about decorating a tree is getting it up and decorated then turning it on only to find that some of your lights don't work!  Plug your lights in before you even put the tree together!  If your lights aren't working it will be easier to fix them if your not fighting an entire tree.  If your tree is not a pre-lit tree then make sure you are using plenty of lights.  A good rule of thumb is 100 lights per foot.  Start at the bottom of the tree and work your way up.  You are going to want to wrap the lights all the way to the back of the branch and back up so you can have depth to the tree.


2.  Fluff
The most important thing I can tell you to do is fluff your tree unless you buy a real Christmas tree then you can skip to step 2.  Your tree has just spent a year in a box smashed and needs to be pretty again.  This can sometimes take longer then putting on the actual ornaments but the result of a fluffed tree versus flat are worth it.  I like to start one section at a time.  If possible start with the bottom section and get it completely fluffed before you put the next section in.  Fluff in different directions.  You don't want all of the branches pointing up or down.  Mix it up.  This will help fill in the holes.

3.  Ribbon
Are you putting ribbon on your tree?  If so, now is the time to put it on.  Ribbon can help reduce the number of ornaments you need to buy.  It's easier to buy a few new ornaments a year then it is to buy for an entire tree.  Use the ribbon to fill in.  There are many different ways you can put the ribbon on.  Check out the photo gallery if you would like ideas.  You can spend as much or as little as you want on ribbon.  If you are on a budget try Hobby Lobby or Michaels.  They generally have ribbon 50% off.

4.  Unity
Now you are finally ready for the fun part!  Ornaments.  I like to have different ornaments on my tree that I have collected over the years.  To make this a cohesive look though you will want to purchase 10-15 (depending on the size of your tree) ornaments that are the same.  For example 12 red balls, 12 gold stars, 12 green dome shapes, etc.  Make sure you are buying different shaped ornaments so you don't end up with a ball tree.  These ornaments don't need to be solid color.  Some of my favorite's are multi-color that sparkle.  Put these ornaments on first and put them deeper into the tree.  Not every ornament needs to be on the tip of the branch.  By placing ornaments back in the tree you will create depth and make your tree look fuller.  Think of a pyramid when you are putting them on.  You don't want them stacked in a straight line on the tree.  These ornaments are also the perfect tool to use to fill in holes that fluffing could not fix.  I like to make sure I have some larger balls that I can tuck in the back of the bottom section of the tree.  This is where the holes tend to be the biggest.  Yes, even on a real tree!  Another great way to create depth is to find some mirrored or disco ball type ornaments.  Tuck these in the back and they will reflect your lights and make your tree appear fuller.

5.  Floral
If you have florals or picks you want to add you can put those in before or after the ornaments.  If they are large florals I would suggest evenly spacing them before you put the ornaments on.  If you are putting sprays in, go ahead and add these at the end.

 Now go crank up the Christmas music and have fun!

Welcome!

My name is Hillary and I LOVE CHRISTMAS!  I have been decorating homes for Christmas in the Dallas area for the past 12 years.  I have had so many questions or requests for help that I decided I would try to pass on what I have learned over the years through this blog.  It doesn't matter how long I have been doing this I still learn something new every year!  I am working on some posts, but in the meantime check out the photo gallery.  Enjoy the pictures and come back soon!